How to Make Art Prints
Art prints bridge the gap between original artwork and accessible art pieces. With the growing popularity of digital technology and high-quality printing techniques, creating art prints has become popular for those wanting to share their work with a broader audience. This process allows for the reproduction of artwork at a fraction of the cost of the original while creating new opportunities for artists to earn money doing what they love.
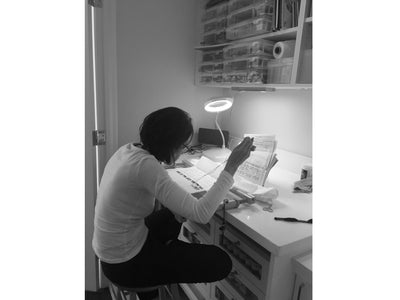
I’m no stranger to prints, so I figured I’d help guide you through making art prints from your original artwork. I’ll cover everything from preparing your artwork for print to choosing the proper printing techniques and paper. Whether you are a seasoned artist looking to expand your repertoire or a beginner curious about art prints, you’ll learn everything you need to know by the time you’re finished reading.
Understanding Art Prints
Art prints are high-quality reproductions of original artwork created through various printing techniques. They offer a more affordable alternative to owning original pieces while still allowing collectors and enthusiasts to enjoy and support the work of their favourite artists. The term "art print" encompasses various printing methods, each offering different qualities and effects suitable for multiple artistic styles and preferences.
One of the most famous art prints is the giclée print, known for its high resolution and colour accuracy. Giclée prints are produced on large-format inkjet printers using pigment-based inks. Another standard method is lithography, a traditional printing technique that creates unique textures and depth.
Screen printing is another popular method characterized by its bold colours and versatility, especially for graphic prints and limited editions. Each printing technique has its advantages, and understanding these can help artists choose the most suitable method for reproducing their original works.
Preparing Your Artwork for Printing
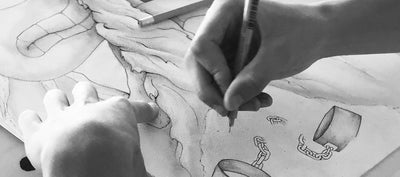
The journey from original artwork to art print begins with the crucial step of preparing your image. High-resolution images are the foundation of quality art prints, capturing your original work's intricate details and vibrant colours. The ideal resolution for printing is 300 dots per inch (dpi), ensuring your prints appear crisp and clear without any pixelation or blurriness.
You may need editing software, such as a high-quality scanner or camera, to digitize your artwork. When scanning or photographing your work, ensure the lighting is even, and there isn’t a noticeable glare. Once digitized, editing software such as Adobe Photoshop or Illustrator becomes invaluable. These programs allow you to adjust your image's brightness, contrast, and saturation to match your original artwork closely. Colour correction is vital, as colours can appear differently when printed. It’s important to save your file in the correct format, with TIFF or PSD formats recommended for preserving quality.
Choosing the Right Paper and Printing Techniques
The choice of paper and printing technique plays a pivotal role in the appearance and feel of your final art print. The paper you select can influence texture, colour absorption, and the overall aesthetic of your print. Various options are available, from glossy and matte finishes to heavyweight cotton and archival papers. Glossy papers enhance colours and contrast, making them suitable for vibrant, detailed images. Matte papers, on the other hand, offer a more subdued, texture-rich finish, ideal for illustrations or designs where glare may be a concern.
Giclée printing is a popular choice for its high fidelity to the original in terms of detail and colour range. This method uses archival inks and papers, ensuring longevity and resistance to fading. For artists seeking a more tactile feel or a traditional aesthetic, lithography or screen printing may be more appropriate. Lithography is well-suited for artworks that benefit from subtle gradations of colour and texture, while screen printing offers a unique handcrafted look, ideal for bold graphic designs or limited edition series.
The Printing Process
Transitioning from preparation to the actual printing process involves a few critical steps to ensure your art prints turn out as envisioned. First, finalize your artwork file, double-check resolution, colour settings, and the chosen format.
Working closely with your printer or printing service to understand their requirements and capabilities is essential. Some printers may offer test prints or proofs, which are invaluable for assessing the colour accuracy and overall output before the final print run.
- File Preparation: Ensure your artwork is saved in a format supported by your printer, with all adjustments made for colour, resolution, and size. Include bleed if necessary, especially for images that extend to the paper's edges.
- Selecting the Print Settings: Consult with your printing service to select the appropriate settings. This includes choosing the correct paper type in the printer settings, determining the right colour profile, and selecting the quality of the print. These settings can significantly affect the final appearance of your art prints.
- Printing a Proof: Before proceeding with the full print run, print a proof on the selected paper. This step allows you to evaluate the print quality, colour accuracy, and overall look of the print. Adjustments can be made at this stage to ensure the final prints meet your expectations.
- Final Print Run: Once satisfied with the proof, proceed with the final print run. Monitor the prints for consistency and quality to ensure each print reflects the quality of the proof.
This stage requires patience and attention to detail, as the choices made here directly impact the tactile and visual quality of your art prints.
Finishing Touches and Presentation
After the printing process, you’ll want to add finishing touches and consider how to present your art prints. These details can enhance the print's perceived value and attractiveness to potential buyers or collectors.
- Trimming and Quality Check: Carefully trim any excess paper from the prints, especially if bleed was used. Conduct a thorough quality check for any inconsistencies or defects in the prints. This ensures that every piece you present or sell meets your quality standards.
- Framing and Mounting: Depending on your presentation preferences, consider framing or mounting your prints. High-quality frames protect the print while adding to its aesthetic appeal. Mounting on rigid substrates can offer an alternative presentation method suitable for galleries or modern interior designs.
- Signing and Numbering: For limited edition prints, signing and numbering each piece by hand can significantly increase its value and desirability. This practice confirms the print's authenticity and connects it directly to the artist. Decide on a consistent location for the signature and number to maintain uniformity across the series.
- Packaging: Proper packaging is essential for protecting the print, especially if it will be shipped or handled frequently. Use archival-quality materials to prevent damage and ensure the print remains in pristine condition over time.
Making Your Own Art Prints: Final Thoughts
Creating art prints is a rewarding journey that bridges the gap between artists and their audience, allowing for broader exposure and appreciation of original artworks. Through this guide, we've explored the essential steps from preparing your artwork for printing, choosing the suitable materials, understanding the printing process, and adding those final touches that make your art prints stand out. It's a process that demands attention to detail, a keen eye for quality, and a deep understanding of your artistic goals.